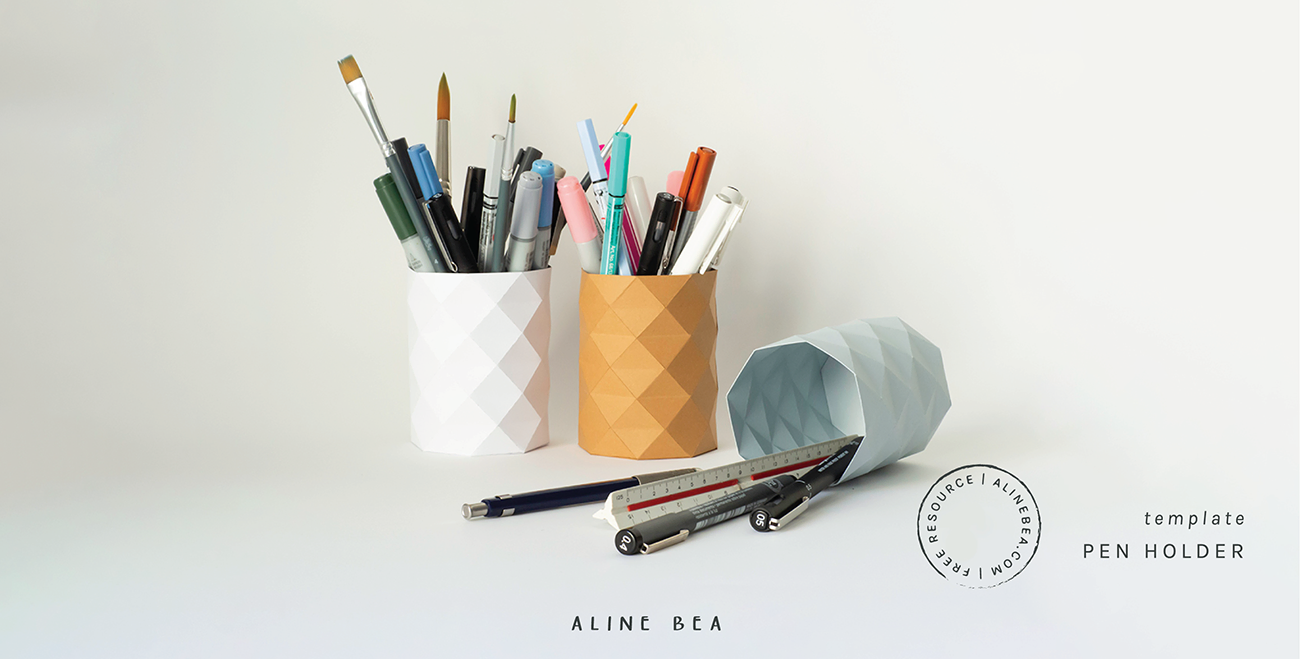
25 Oct Pen and pencil holders – DIY project
Say goodbye to boring and messy office desks. Here I am to tell you that it’s possible to have fun (and even a therapeutic moment) while organizing and adding some color to your routine. These pen, pencil, brushes, and makeup holders can bring any space to life, they’re cost almost nothing, and take almost no effort to make. Combine crafting with a FSC-certified paper and create your own sustainable and eco-friendly alternative to industrialized organizers. How great is that?
Anybody can do it, no special talent required – I prepared a template that you can print and assemble + an illustrated step by step tutorial on how to do it. Can’t wait? Scroll straight down to the form and tell me where I should send yours. But if you can spare a few minutes, I’ll tell you the story behind this craft project, share some tips and suggestion on how to use them and, hopefully, take the color decision of your shoulders. Shall we?

Free template including:
- List of supply with recommendations
- Printable build on template.
- Easy and illustrated step-by-step tutorial on how to assemble the template.
- Tips on how to get the best results and experience in the making.
Done!
Your tutorial and template is on the way! Please, check your inbox.
Beware that you will need to confirm your e-mail first by clicking the link I just sent you.
No email? Please, check your spam folder, and if you need any assistance, contact aline@alinebea.com. I will be glad to help you.
See you around!
Crafting pen holders since 2015
I first started to craft these pen holders when we moved to Germany. At the time, I was doing my master’s degree and looking for some affordable and sustainable alternatives to organize my workspace at home. We arrived in Germany with just one backpack each – no room for anything besides essentials. Since we didn’t know how long we’d stay, we were also avoiding buying things that we’d need to get rid of later. That is when our minimalist way of life began.
And that was all that this creative and crafty lady here needed to make a visit to her favorite paper store, get some beautiful colored paper and get to work. Some years and two countries later, I’ve lost track of how many of these pen holders I brought to life. I’ve also crafted some very colorful ones for my 3-year-old goddaughter, that already has a whole collection of pencils and creative tools, and she loved it! That’s when I realized how appealing they can be for kids. I’d say it’s a smart way to make their study place more attractive, but also as an incentive to keep their workspace (a little) organized.

You'll need
- thick cardboard paper (A4 size) + a printer
- good white glue
- ruler
- snap-off utility knife or any other knife for handicrafts
That’s it.
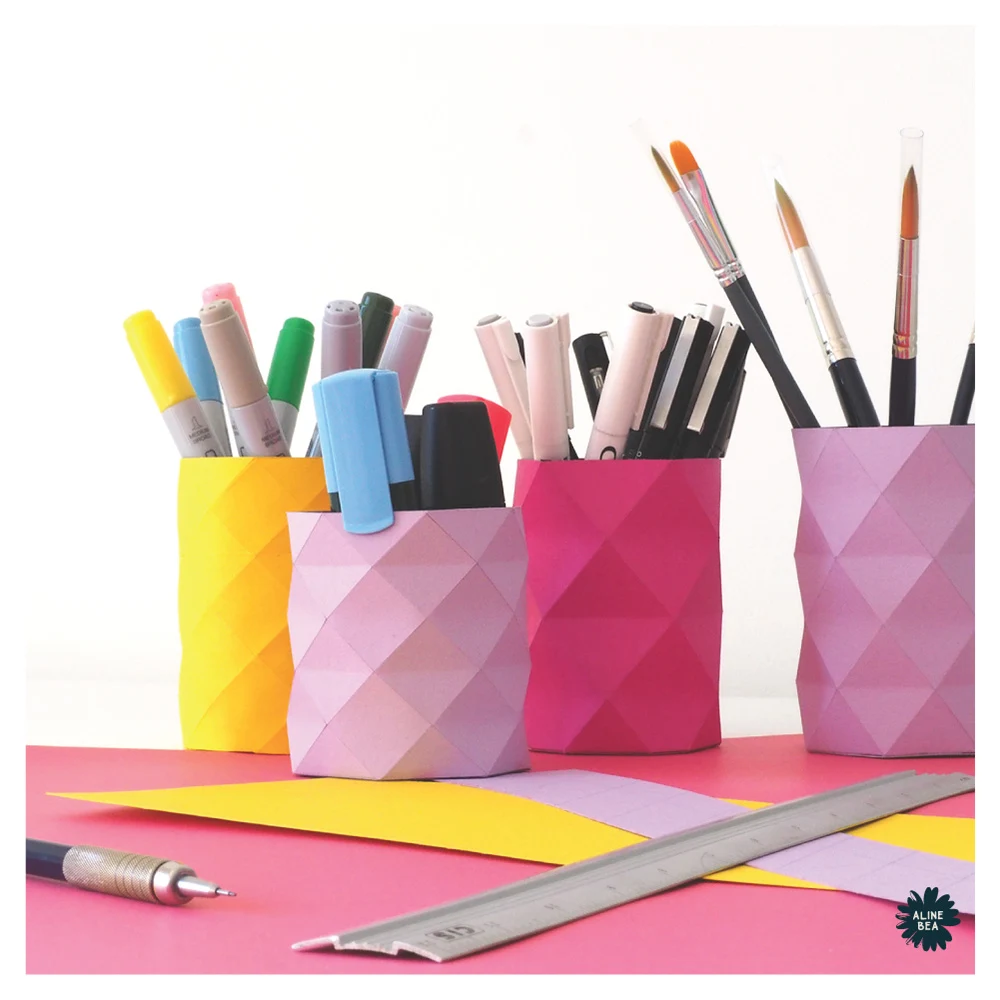
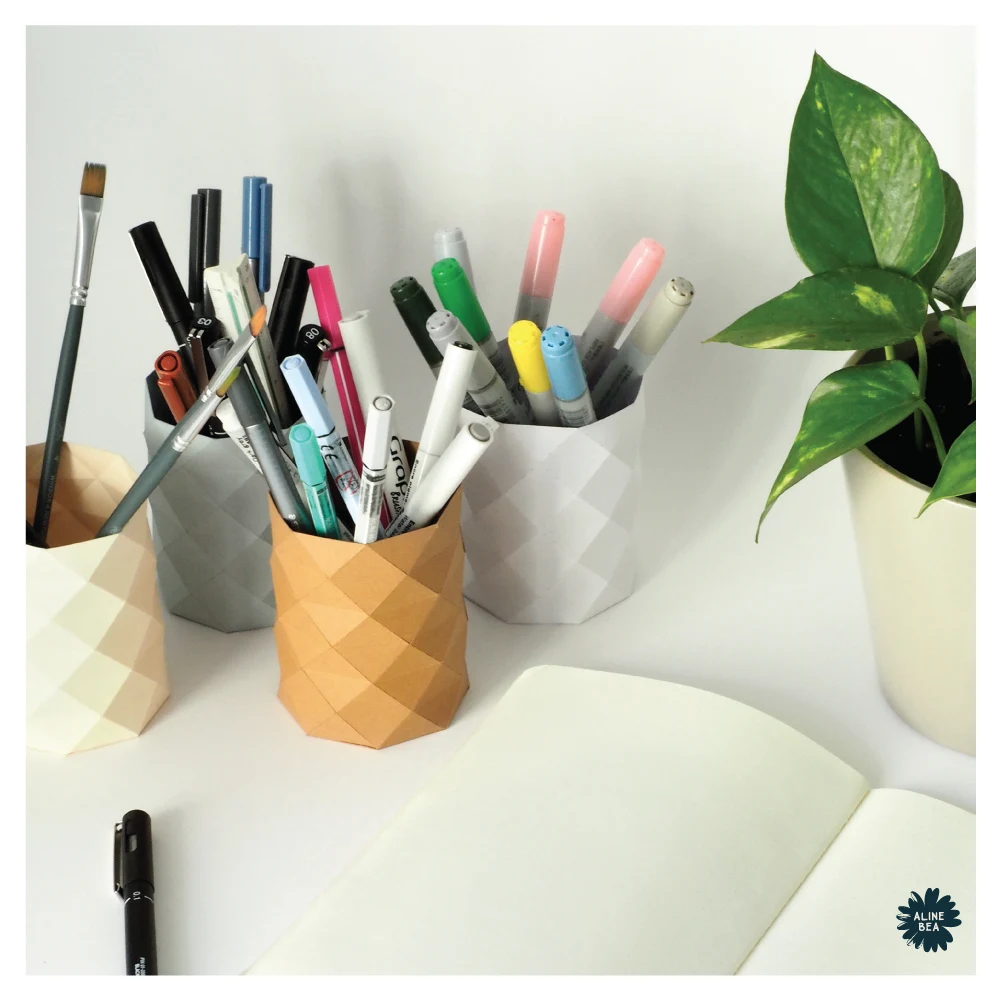
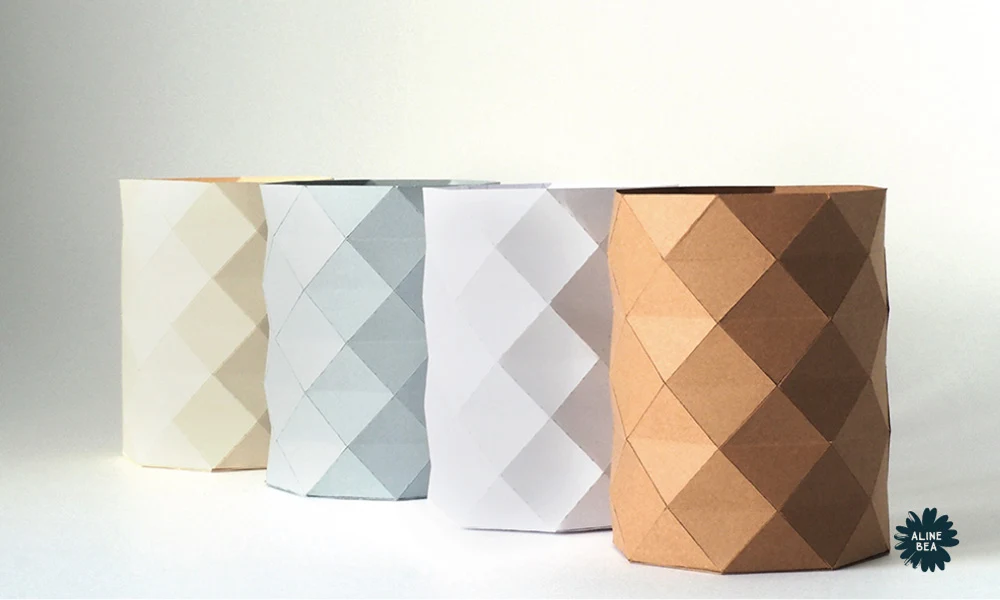
Be creative with the colors, you can match them to your room decor or just go for your favorite combination. I have them in my office, in my bedroom to hold my makeup and even in my kitchen (where I keep some pens to take notes). But worry not, just keep reading for some tricks on color decision.
Some awesome ideas to your pen holder project:
- Birthday party souvenir, matching the colors of the party decoration. Include some colorful pens and even a notebook in the kit – it’ll be a success among kids. If you’re concerned with the amount of work this would represent, crafting a bunch of pen holders, I should say that after the 3rd one you will be making one pen holder each 5 minutes. Call your best crafty-friend and have fun together!
- Christmas, first day of school or any other date, combine them to some nice coloring books and pencils and you have your own original and personalized gift for the little ones in your life.
- Teachers and professors working with kids – here’s a nice way to organize your classroom and even sorting pencils and pens by color, as an educational activity.
- Organize your office desk using some neutral colors or metallic papers for a fancy result. Or if you are a colorful and creative person, well, I don’t even need to recommend which color to use, you got this.
- Makeup holders – I use it for my brushes and everything else with a pen-like shape. Tip: cutting the body of the template’s size in half you’ll reduce the holder’s height, which allows you to use it for smaller things, such as lipsticks.
- Print the template in an A3 sheet rather than the original A4 if you’d like a bigger pen holder. Depending on the purpose, you may want to cut body of the template’s size in half, reducing its height. This way you will have a bigger diameter, but more or less the same height as the A4 one.
Tips on deciding colors
Facing a huge shelf full of beautiful papers and too many color options? I know the feeling. It can be overwhelming. What helps me a lot in this situation is narrowing down the colors before going to the store. You may get there and decide on different hues, but at least you’ll have way few options.
Take a look also at the metallic or decorated papers available in the store (but mind the tutorial’s recommendation on paper thickness), because they can provide some interesting effects. Here are a few tips to help decide:
- Look around the place where you’ll display your pen holders, try to identify the predominant colors already there, on a cushion, on a wall, on any object that will always be in the room or alongside the holders. To make it easier, narrow it to one or two predominant colors.
- Now, identify these colors on the color wheel below. You’ll need to abstract from the hue variations, choose the most similar.
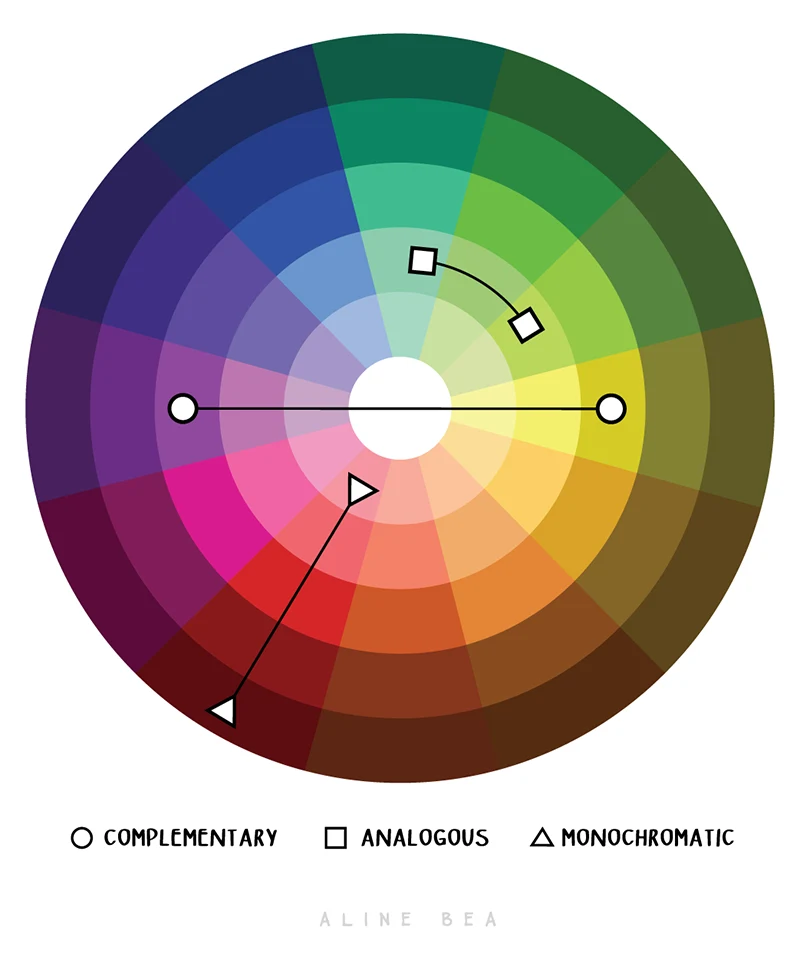
3. Ask yourself what are you looking for that space, a more contrasting and vibrant effect, or something more harmonic that will make the pen holders to blend into the room decor?
- For contrast: looking at that color in the graphic above, select the color on the opposite side of it. They are called complementary colors and when together they reinforce each other and create the strongest contrast you can have, making each other pop up. I.e. If orange is the predominant color in your room, you’d choose a hue of blue for the pen holder’s paper. And if you’ll have more than one pen holder and want to have different colors, you can either continue to play with the predominant colors in the room or select colors on the color wheel that are just by the selected one. In this example, it would be a hue of green or violet or both. (see graphic below)
- For harmony: look for the predominant color in the color wheel and select one of the colors right beside it. They’re called analogous colors, and they almost blend into each other when together. I.e. If orange is one of the colors in your room, you’d choose a hue of mustard or a hue of guava pink for the paper’s color. For more than one pen holder and different colors, you can choose different hues of the same color or select the colors adjacent to the first one you chose. In this example, it would be a hue of yellow or a hue of red, or both. (see graphic below)
- For neutral: look for the predominant color in the color wheel and select colors in the same slice of the “pie”. They are called monochromatic, i.e., hues of the same color. In our example we’re using, one of the predominant colors in the room is orange, so you’d choose different hues of that orange for the paper. (see graphic below)

I hope this was helpful. There are so many possibilities for these organizers, and I can’t wait to see what you’ll be using them for. Please, tag me on social media or send me a message when you do – I’d love to see your projects!
Now, go grab your tutorial and template and have fun!

Free template including:
- List of supplies with recommendations
- Printable build on template
- Easy and illustrated step-by-step tutorial on how to assemble the template
- Tips on how to get the best results and experience in the making
Done!
Your tutorial and template is on the way! Please, check your inbox.
Beware that you will need to confirm your e-mail first by clicking the link I just sent you.
No email? Please, check your spam folder, and if you need any assistance, contact aline@alinebea.com. I will be glad to help you.
See you around!
No Comments